Column
Hydraulic Pump Not Building Pressure? Causes, Troubleshooting Steps, and Repair Costs
Are you having trouble because the pressure in the hydraulic system of your construction machinery will not build, bringing work to a stop? If the problem is left unaddressed, surrounding components may also be damaged, resulting in repair costs and downtime far beyond what you originally expected.
This article explains six common causes of hydraulic pump pressure failure and safe procedures for identifying the
problem area on site.
It also covers typical repair costs, how to think about parts replacement, and key points for regular inspections to
help you reduce unnecessary maintenance expenses.
How a Hydraulic Pump Works and What It Means When Pressure Does Not Build
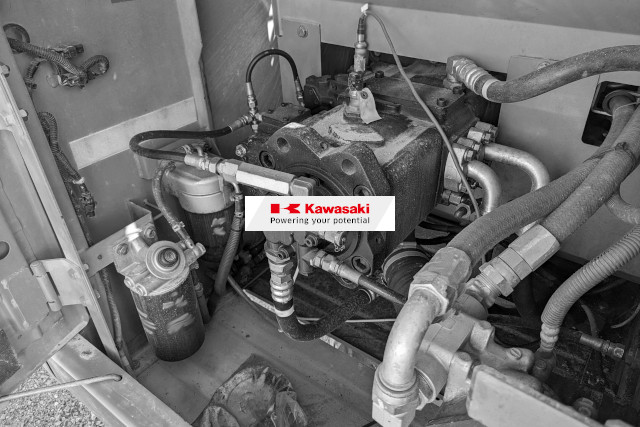
A hydraulic pump uses power from an engine or motor to deliver hydraulic fluid and generate the force needed to
operate construction machinery.
By pushing fluid through a sealed system, it transmits strong pressure to cylinders and motors.
However, after many years of use or insufficient maintenance, problems can occur that prevent pressure from building
properly.
When pressure drops, machine movement becomes sluggish, and in the worst case, the machine may stop operating
entirely, creating a safety risk.
Because this can lead to work delays and unexpected accidents, the cause must be identified and addressed as quickly
as possible.
Six Reasons Hydraulic Pump Pressure May Fail to Build
Understanding the six most common causes of pressure loss on site makes it easier to compare them with the condition of your own machine and quickly narrow down the likely cause.
- Internal pump components are worn
- The pressure control valve is malfunctioning
- Foreign matter has entered the hydraulic fluid
- Poor suction is occurring
- Air has entered the hydraulic circuit
- Rising oil temperature has reduced viscosity
Use these points to guide proper maintenance and troubleshooting.
Related Articles:Hydraulic Pump Failure: Common Causes, Symptoms, and Troubleshooting Tips
Internal Pump Components Are Worn
One of the main causes of pressure loss is wear of internal components such as pistons, the cylinder block, valve
plate, and oil seals after long-term use.
When these parts wear down, the pump can no longer maintain its original sealing performance, and hydraulic fluid that
should be discharged leaks internally through the clearances.
As a result, the amount of fluid delivered decreases, and the pump can no longer generate enough pressure to move the
machine properly.
Wear progresses more easily during continuous high-load operation or when degraded hydraulic fluid is used for an
extended period.
Because internal wear cannot be checked visually from the outside, it is essential to measure discharge volume and
pressure regularly to understand the condition inside the pump.
Related Articles:Hydraulic Pump Components Guide: Main Parts, Functions, and Failure Response
The Pressure Control Valve Is Malfunctioning
If the control valve that keeps pressure in the circuit at the proper level malfunctions, pressure may fail to reach
the set value.
The role of this valve is to release fluid when pressure becomes too high, protecting the circuit.
However, the internal spring can deteriorate over time and shift the setting, or debris can become trapped in a small
clearance and cause the valve to stick open.
If the valve remains open, pressure will keep escaping even while the pump is discharging fluid, making normal
operation impossible.
If pressure suddenly stops building, inspect the pressure control valve for sticking, wear, or incorrect settings
caused by deteriorated components.
Foreign Matter Has Entered the Hydraulic Fluid
When fine sand, dirt, or metal particles enter the hydraulic fluid, they can cause serious problems throughout the
hydraulic system.
As contaminated fluid circulates through the circuit, moving parts inside the pump and valves are worn down as if they
were being rubbed with sandpaper.
The filter may also become clogged, severely restricting fluid flow and causing pressure to drop.
Foreign matter can enter from outside during refilling, and metal particles can also be generated as internal parts
wear.
To avoid shortening the service life of the equipment, inspect the cleanliness of the hydraulic fluid regularly and
maintain the specified cleanliness level.
Poor Suction Is Occurring
If the pump cannot draw hydraulic fluid properly from the tank, the specified pressure will not build.
When the fluid level in the tank is too low, or the suction strainer is blocked with debris, fluid cannot flow
smoothly.
If the pump tries to draw in fluid while the level is insufficient, fine bubbles can form and collapse inside the
pump.
When this occurs, the resulting shock can be strong enough to gouge metal surfaces, potentially damaging the pump in a
short period of time.
If you hear abnormal grinding or rattling noises, stop the machine immediately and check the suction-side piping and
hydraulic fluid level.
Air Has Entered the Hydraulic Circuit
If fittings or packings on the suction-side piping have deteriorated over time, air may be drawn in through even a
very small gap.
Hydraulic fluid mixed with air becomes foamy and cloudy, and it is more easily compressed, like a sponge.
Hydraulic systems transmit force by taking advantage of the fact that oil is nearly incompressible, so when air is
mixed in, pressure cannot be transmitted properly.
As a result, cylinder movement may become unstable, or pressure may fail to reach the specified level.
If you find fine bubbles floating on the surface of the fluid, check whether pipe connections are loose or components
are damaged.
Rising Oil Temperature Has Reduced Viscosity
When hydraulic fluid temperature rises beyond the proper range, the fluid becomes thinner and its viscosity drops.
As viscosity decreases, fluid leaks more easily through even tiny clearances that would normally be sealed, increasing
internal leakage inside the pump and preventing pressure from building.
Common causes of high oil temperature include a dirty or underperforming cooling system and long periods of continuous
operation.
If the temperature remains too high, the fluid will deteriorate more quickly, and rubber seal components will harden
and become more prone to damage.
Clean the cooling system and adjust operating time as needed so the hydraulic fluid stays within the proper
temperature range.
Steps to Take When Hydraulic Pump Pressure Does Not Build
If pressure suddenly drops, disassembling the machine at random can cause secondary damage or accidents.
To safely narrow down the cause, check the machine in the following three steps.
- Secure safety and inspect the exterior
- Check pressure, sound, and temperature
- Identify the problem area from the tank return lines and related points
Following these steps will help lead to an accurate repair.
Related Articles:How to Test a Hydraulic Pump: Step-by-Step Methods and Inspection Procedures
Secure Safety and Inspect the Exterior
Before starting inspection work, stop the engine and release any pressure remaining in the hydraulic circuit.
High-pressure hydraulic fluid can cause serious injury if it sprays out, so worker safety must come first.
After confirming that the surrounding area is safe, carefully inspect the exterior of the entire machine.
Check the tank level gauge to confirm that the hydraulic fluid is at the specified level, and look for leaks around
pipe and hose connections.
Also check whether the fluid has turned milky or become severely darkened.
Identifying visible abnormalities first will make it easier to determine the cause smoothly.
Check Pressure, Sound, and Temperature
If there are no obvious external problems, operate the machine and read the pressure gauge to confirm whether pressure
reaches the specified value.
At the same time, listen carefully for abnormal sounds around the pump.
Grinding metallic sounds or sharp knocking noises can indicate a serious internal problem.
Also check the surface temperature of the tank and piping to see whether any area has become abnormally hot.
By observing how pressure builds, what sounds are present, and how temperature changes, it becomes easier to determine
whether the problem lies in the pump itself or somewhere else in the system.
Identify the Problem Area from the Tank Return Lines and Related Points
After checking pressure and sound, trace the hydraulic flow path to narrow down where the problem is occurring.
One effective method is to remove the return lines from the control valve or cylinder to the tank and check the amount
of fluid returning.
For example, if a large amount of fluid flows from the return line even when the cylinder is not being operated, the
internal packing may be damaged and allowing oil to pass straight through.
By tracing each line one by one and observing pressure changes, you can identify whether the issue is occurring in the
pump, valve, or cylinder, and then move on to the appropriate parts replacement.
Typical Repair Costs, Lifecycle Cost, and How to Approach Parts Replacement
Once the problem area has been identified, you need to consider repair costs and choose parts with future operation in mind.
To keep the machine operating reliably over the long term, consider the following three points.
- Main repair items and typical cost ranges
- Differences and risks between genuine and non-genuine parts
- How to accurately identify genuine parts using apps and other tools
Use these points as a reference when balancing cost and safety and deciding on the repair policy.
Main Repair Items and Typical Cost Ranges
Repair costs vary depending on the failed component and the size of the machine.
Minor oil leak repairs, such as replacing pipe fittings or packings, often cost only several tens of thousands of yen.
However, if the pump itself or a cylinder must be replaced, the total cost, including parts and labor, can range from
over JPY 100,000 to several hundred thousand yen (USD 625 to several millions of dollars).
If a full overhaul involving disassembly, cleaning, and parts replacement throughout the system is required, costs can
approach JPY 1,000,000 (USD 6270) in some cases.
Detecting abnormalities early and resolving them with small parts replacement is the best way to keep overall repair
costs down.
Related Articles:Hydraulic Pump Replacement Guide: Cost, Timing, Procedures, and Maintenance Tips
Differences and Risks Between Genuine and Non-Genuine Parts
When replacing parts, choosing non-genuine parts simply because they are inexpensive can lead to unexpected
trouble.
Even if non-genuine parts look the same, their material quality and dimensional accuracy often do not meet the
manufacturer’s standards.
Using parts that do not meet those standards increases the risk of premature wear and can even damage surrounding
equipment.
Another major disadvantage is that manufacturer warranty coverage may no longer apply if an accident or failure
occurs.
To extend machine life and reduce lifetime maintenance costs, using genuine parts is recommended.
How to Accurately Identify Genuine Parts Using Apps and Other Tools
To arrange the correct genuine parts, you need to know the exact model of the pump currently installed on the
machine.
In recent years, manufacturer-provided smartphone apps have made it easier to identify parts directly from the
jobsite.
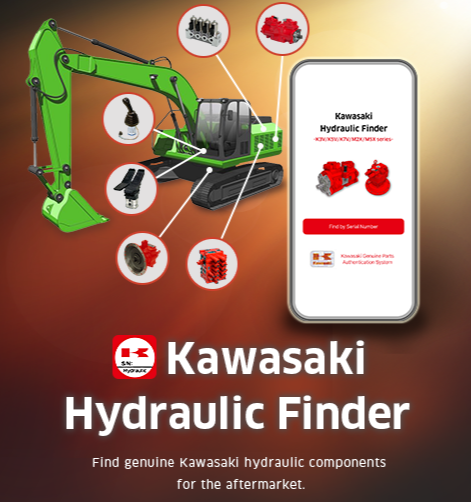
For example, “Kawasaki Hydraulic Finder” can read the information stamped on the pump nameplate and help confirm the
manufacturer, exact product model, and product number.
This eliminates the need to search through drawings and helps prevent ordering the wrong parts.
The app can also help you find authorized service centers, supporting smoother repair arrangements.
Summary: Prevent Hydraulic Pump Pressure Loss and Keep Your Machine Operating Safely
To prevent performance loss and downtime caused by non-genuine parts, the first step is to confirm whether the components installed on the machine are genuine.
“Kawasaki Hydraulic Finder” is a service that allows you to identify genuine parts and confirm accurate information
simply by entering the serial number shown on the nameplate.
After confirming the information, you can use it to contact an official dealer, so be sure to take advantage of it.
Reviewed by

Ryoji Irie
Manager
After-Sales Promotion Office, Marketing & Sales Group, Precision Machinery & Robot Company, Kawasaki Heavy Industries, Ltd.
《Career History》
After joining Kawasaki Heavy Industries, I spent ten years developing the new K7V pump series as a design engineer, followed by five years at KPM (UK) as an application engineer supporting European OEMs and distributors. I am currently responsible for promoting the after-sales business globally.